#1 - Service countdown
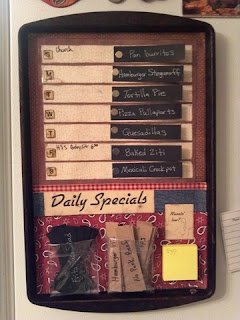
One of the first things we do is to fill up our Service Countdown with ideas. This year we had 4 weeks in December in which to share the Christmas spirit. We had never really scheduled acts of kindness before, so we started off slow. We got 4 small envelopes, 12 small cards of paper (that fit into the envelopes) and a piece of ribbon to hang them on. My girls and I sat down and came up with 4 activities that we could do together that would build up our family, 4 ideas to fix up or improve things around our house and 4 ideas for serving others in the community. By no means do we limit our acts of kindness to just those 4 community activities, but it was a place to start and brought our minds to serving others. We put 1 idea from each category into each envelope, labeled the envelopes with the weekly breakdowns for weeks 1-4 and hung them up in the living room. Each Sunday afternoon in December we open an envelope with our Advent reading and decide when to do each of the activities in the envelope during the upcoming week.
Some ideas to get you thinking:
For the family:
Game night
Spa time (manicures, pedicures, facials - serving each other or just doing it together)
Movie night with popcorn and snacks
Formal dinner night
Picnic in the living room
Family drive or walk around the park
For the house/home:
Clean up the yard
Paint a room
Shampoo some carpet
Clean the windows
Clean out the fireplace
Clean out old toys/clothes and donate ones that can still be used by others
For the community:
Donate to a Salvation Army red kettle bell ringer (or pick a few and spread the love)
Bless a bell ringer with a Starbucks or McDonald's gift card so they can warm up
Leave an extra big tip when you go out to eat
Leave goodies in your mailbox for your mail carrier or by your trash cans for the truck drivers
Take goodies to the local fire department or police station
#2 Crafts
We are a crafting family and enjoy spending time making things together. Here are a few of the things we have created this year.
Apple Cinnamon Ornaments
Equal parts applesauce and ground cinnamon (we get both at the dollar store).
Mix them until they form a ball. Roll it out and use cookie cutters to cut shapes.
Lay the ornaments on wax paper and poke a hole with a toothpick for the string to go through.
Each morning for the next week or so, turn the ornaments over so they dry completely.
When dry, use white fabric paint (in a little bottle with fine tip spout) to put on the "frosting" and string with a piece of ribbon or paper clip. The scent will last for years.
Advent calendar (countdown to Christmas)
Metal pizza pan
12x12 piece of patterned paper
23 bottle caps (or other "ornaments" for the tree)
Tree shape on green paper with numbers 24-1 printed on it (1 at the top)
24 images or pictures for the "ornaments"
24 magnets for the "ornaments"
2-3' of ribbon for hanging
Way to punch holes around the edge (optional - I used a Cropodile)
Cut the patterned paper to fit inside the pizza pan. Use adhesive to secure.
Cut out the green paper tree to go in the center of the pan. Use adhesive to secure.
Punch holes around the edge of the pizza pan for the ribbon to weave in and out. Tie both ends at the top in a bow leaving 4-7" of space above the pan for hanging.
Cut images to fit inside the bottlecaps and secure each image into a cap.
Glue magnets to the back of each bottlecap.
Beaded candy canes
Red and white beads
Red or white pipe cleaner (chenille stem)
Put on one bead and bend the end of the pipe cleaner up to keep the bead from falling off. Let children alternate red and white beads until they reach the other end of the pipe cleaner. Bend the end to keep the beads from falling off and bend the whole thing into a candy cane.
Melted Snowman Ornament
Glass or plastic ornaments (must be able to remove the hanging part at the top)
Salt
5 peppercorns
Orange polymer clay
Optional - tag with string
Make small orange cones from polymer clay (make sure they are small enough to fit inside the ornament opening). Bake to harden.
Remove the top of the ornament ball.
Using a funnel if you have one, fill ornament 1/4 - 1/3 full of salt.
Drop in one nose and 5 peppercorns.
Replace the top and add tag if you'd like.
Santa-tizer (hand sanitizer)
Bottle of hand sanitizer
Red paper (as tall as the bottle and long enough to wrap all the way around)
White paper 1" wide and long enough to wrap all the way around the bottle)
Black paper 1" wide and long enough to wrap all the way around the bottle)
Silver or gray paper 2" square (for the belt buckle)
Tag: white and black paper, pen for writing, and string for attaching (I used a black pony-tail holder)
Paper punch with decorate edge for bottom trim of coat
Paper punch for buckle - slot punch and corner rounder
Paper glue (we used Zip Dry)
Use border punch to punch scallop or other edging on white strip of paper.
Attach white strip to the back of the red piece cut to fit around the bottle.
Cut out buckle with 2 slots and rounded corners; trim to size you want.
Thread the black strip through the slots and attach the belt and buckle to the red coat.
Wrap the completed coat around the bottle and secure in place with strong paper glue (we tried several adhesives and even red line tape did not hold. Secure in place with tight rubber bands until dry)
White that is drying, you can cut a tag shape from white paper, back with black if you'd like, write "Santa-tizer" on the tag and attach to the bottle with ribbon, string, or a pony-tail holder.


